DIY Personalized Wire Hangers
When I first started the personalized hangers I didn't think it would be that hard until I tried and found out that it's not really that easy. I found these two websites to be the most helpful.
http://shellchris.weebly.com/custom-hangers.html
http://www.youtube.com/watch?v=bUwej7OYzJs
The first attempt was not very good. I got pretty irritated and started looking on etsy. After I slept on it I tried again at work and did a little bit better. Thinking my third time would be a charm I ended up doing worse and started looking on etsy again. At this point I had already went through 3 rolls of floral wire and only had one left. Why keep spending money on these wires if eventually I could just pay for one on etsy.
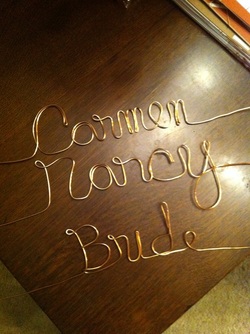
Well thankfully a fellow bride on the knot posted a pic of her "Bride" hanger and I remember thinking how bad it looked. After sleeping on it once again I realized that it doesn't really have to be perfect, it's the fact that I made it that makes it special. So my fourth attempt I sat at the kitchen table wrote/drew the names and used that as a guide. I actually did a lot better. Although they are still not perfect they are pretty close and for it being done by me it does make it great.
Letters that were hard were d's, e's, and i's. The m's and n's were a little tricky but I just made sure I sketched the first hump to make sure the other humps matched. The 'a' was ok as long as I used a bottle cap to help with the curve.
Here is a look at my progress of my hangers:
http://shellchris.weebly.com/custom-hangers.html
http://www.youtube.com/watch?v=bUwej7OYzJs
The first attempt was not very good. I got pretty irritated and started looking on etsy. After I slept on it I tried again at work and did a little bit better. Thinking my third time would be a charm I ended up doing worse and started looking on etsy again. At this point I had already went through 3 rolls of floral wire and only had one left. Why keep spending money on these wires if eventually I could just pay for one on etsy.
Well thankfully a fellow bride on the knot posted a pic of her "Bride" hanger and I remember thinking how bad it looked. After sleeping on it once again I realized that it doesn't really have to be perfect, it's the fact that I made it that makes it special. So my fourth attempt I sat at the kitchen table wrote/drew the names and used that as a guide. I actually did a lot better. Although they are still not perfect they are pretty close and for it being done by me it does make it great.
Letters that were hard were d's, e's, and i's. The m's and n's were a little tricky but I just made sure I sketched the first hump to make sure the other humps matched. The 'a' was ok as long as I used a bottle cap to help with the curve.
Here is a look at my progress of my hangers:
 |
 |
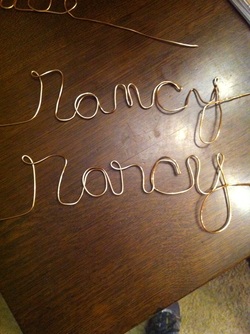
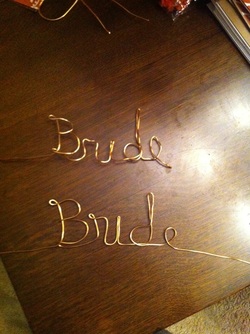
Before and After Pictures. The top is my first attempt and the bottom is my fourth attempt.
 |
 |
Tips
The biggest tip I can give is think ahead.
*You will want to look through pictures to see how other people did names.
*Also draw/write the name out on a piece of paper as if you using the wire that way you know which way you are going (especially helpful with the 'd' there are a couple different ways to do the 'd').
*Do not use capital letters! It will be too large and hit the hanger (see pictures)
*And a good tip from fellow knottie AllyG303, use beading pliers because the prongs are rounded all the way around (not flat in the inside), this helps with smoothness.
*And my last tip, practice practice practice. Like I said I went through 4 rolls of floral wire!
Hope this is helpful and good luck!
Fun Add On's

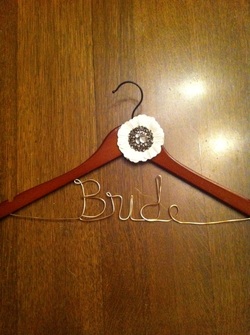
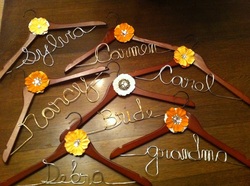
To decorate the hanger I decided to use flowers. Some girls will do ribbon, write the wedding date with puff paints or the title like: Maid of Honor, Mother of the Bride, etc. I had some flowers around the house that I had purchased from Michael's the previous year so I decided to use them.
They came in a pack of 3 different colors: white, peach, and orange. Since my colors are brown and orange I decided to use these flowers.
I glued two together making different color combinations (except for the bridesmaids, which were the same), purchased some inexpensive jewels (kind of like the ones for bedazzling). With craft glue I made different combinations for the center.
The one in white (which is the bride's) is actually a little jewelry thing I got in the jewelry aisle at Michael's, it was suppose to be for my unity candle but I went a different route for my unity candle.
They are pretty cute (yes I am proud) and I have some extra left over I think I will make some cute hair pieces out of the extra!
